Panel Works Continue

The panel work within L516 continues. 3 more cedar bunk panels have been stripped back to bare timber.

L516Xmas2014_01
L516Xmas2014_02

And the French polished panels returned to Eveleigh.

L516Xmas2014_03

Steve’s corner is looking great, and come a very long way from the dismantled dingy space that it has been for years. The Lily pattern has been painted and light fitting installed.

L516Xmas2014_04

Given that most of the original timber panelling on this wall had rotten beyond repair (in most instances, reduced to crumbling dust), Steve has done an amazing job to produce such a stunning finish. The fielded panels are all that remains of the originals, and this has been adapted to retain as much of the heritage value as possible.

L516Xmas2014_05

The former toilet will spend a lot of time locked off as a store room, so the illuminated “LAVATORY ENGAGED” sign will be a pleasing novelty synonymous with Ritchie Bros cars. Roy’s excellent sign writing skills have reproduced the MEN lettering.

L516Xmas2014_06

Roy has also been reproducing the lettering on the walls in the compartments on the new French polish. All the sign writing is done by hand.

L516Xmas2014_07

The big wall near the centre car doors has also been stripped back to bare timber and French polished following the painting of the roof and fitting of light fittings.

L516Xmas2014_08

Meanwhile the hole has been drilled in the floor to locate the new toilet now that Ross and his team of volunteers have fitted the new retention tank. We’re also playing around with the flush mechanism and plumbing to see what fits. Note the location of the window to the toilet, but we’ve resisted temptation to make this a toilet with a view by locking the window off.

L516Xmas2014_09

The full set of new cushions for the lounge area has also arrived, and test fitted.

L516Xmas2014_10

With all the fiddly jobs in the compartments coming to a close, the lounge area remains one of the last big jobs before L516 is complete. We look forward to tackling this in 2015. But for now it is the festive season.

We wish all our friends and supporters of 2014 a safe and happy festive season. It’s been another year of great progress and we look forward to working with everyone again next year.

The Saga of the Seats

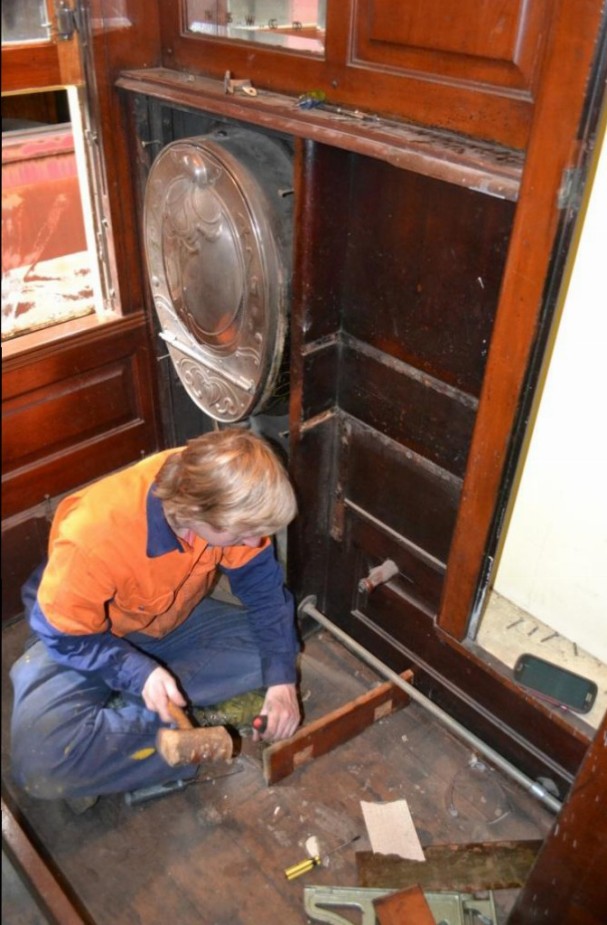
While the Eveleigh team have been busy working on the TAM at the shed, our two highly skilled volunteer upholsterers George and Alan have been doing an amazing job working from their workshop near Penrith in western Sydney. They have taken delivery of the full 5 compartments of seats and bunks, and the following is their story.

There are twenty units in all, consisting of a top bunk, lower bunk/seat back, bottom seat, and a small fold-down dicky seat for each of the five sleeping compartments. All were in poor condition with old discoloured and damaged vinyl and broken and numerous missing parts.

MaterialWork - pic01

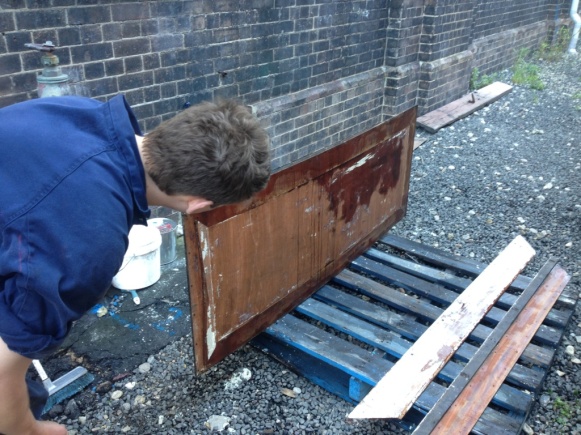
This seat base had a broken frame.

MaterialWork - pic02

All of the fold-down seat backs had some degree of damage and repair to the bottom corners.

MaterialWork - pic03

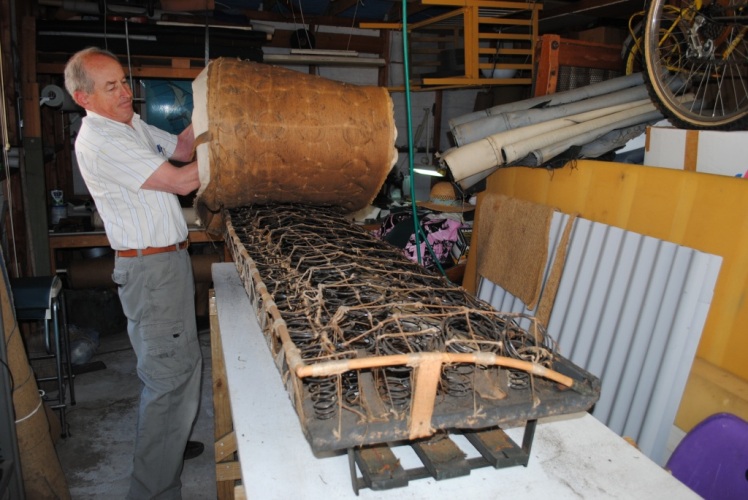
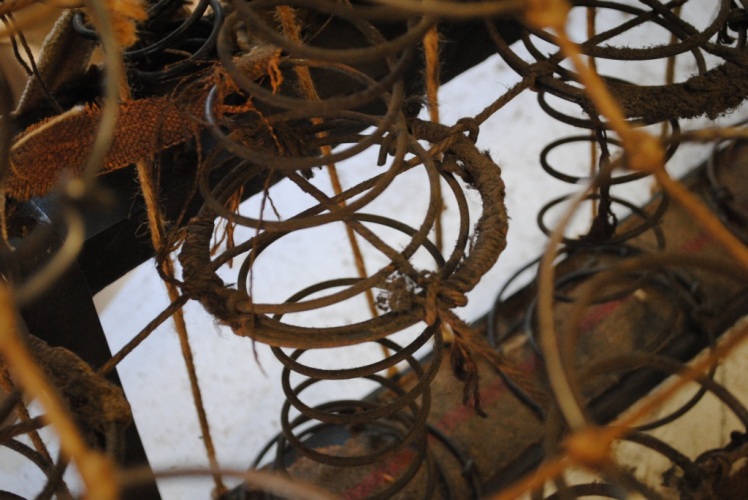
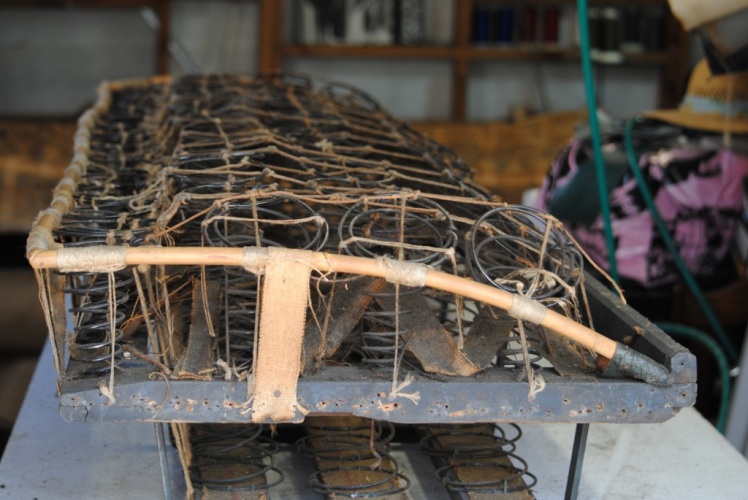
And this lower bunk arrived in this state….note the damage to the springs.

MaterialWork - pic04

But this is typical of the bunks…. This is going to be a lot of work. (isn’t it always?)

MaterialWork - pic05

The Top Bunks:

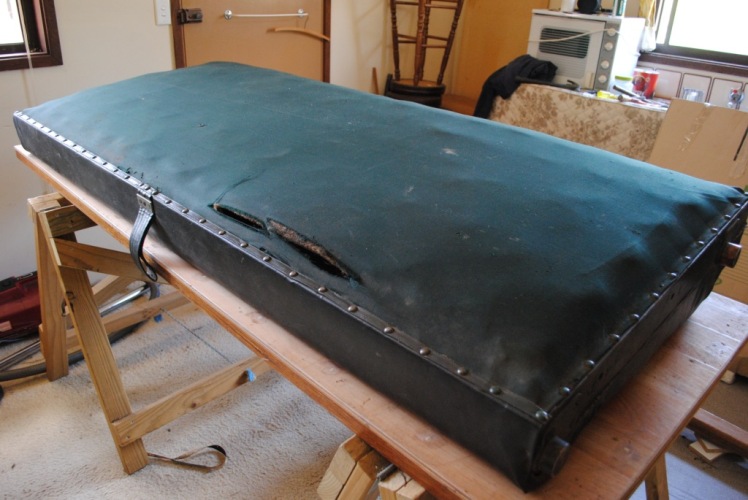
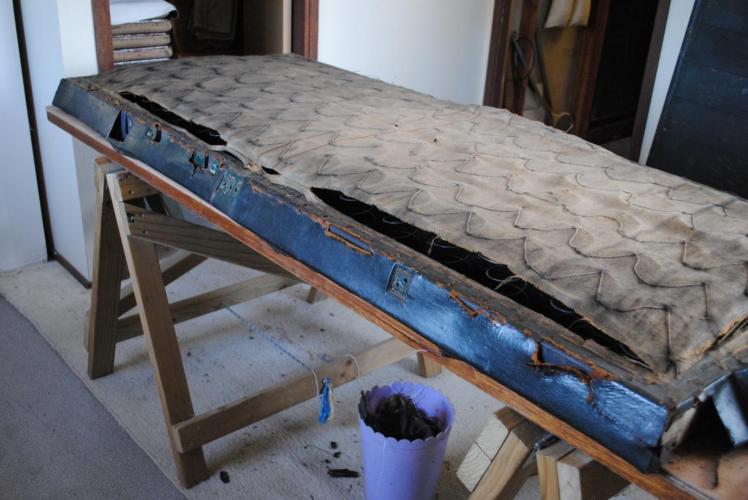
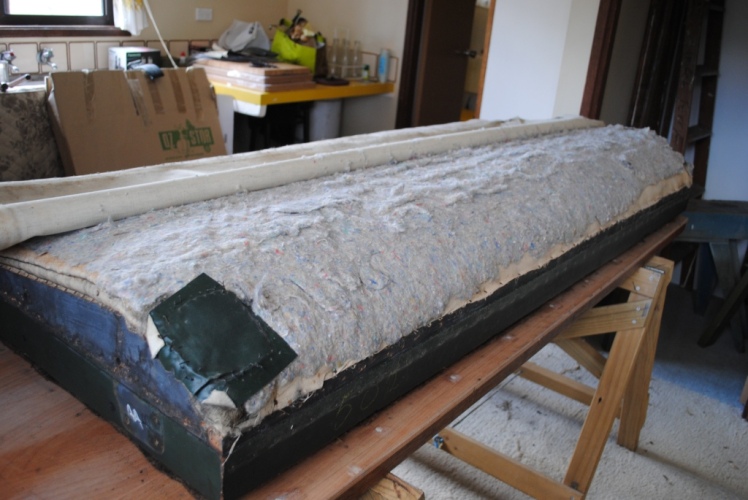
We started off with the top bunks. This is what it looks like when the green fabric is removed.

MaterialWork - pic06

Originally, all of the TAM seat units were leather covered but while the lower seat and back had been re-upholstered in railway green vinyl, the edge trim on these upper bunks was the original leather. This is how they joined the leather, by tapering and overlapping the edges, a technique known as “skiving”.

MaterialWork - pic07

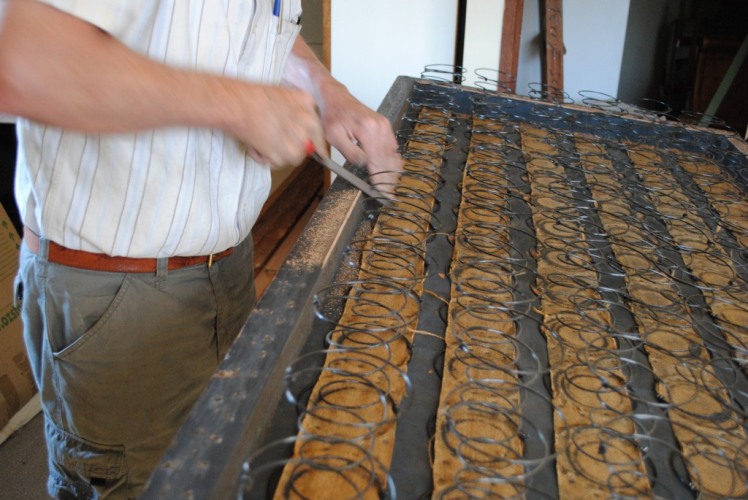
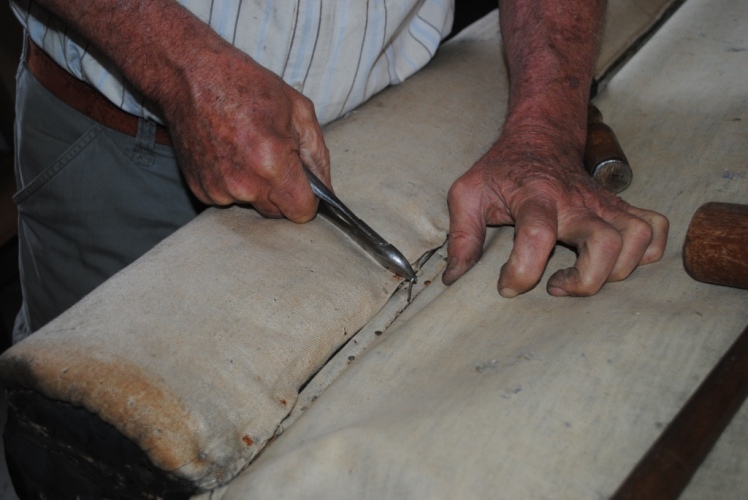
Removing the old upholstery is not all just rip, tear, bust either; upholstery tacks are removed one at a time using a “ripping chisel” and wooden mallet, just like this.

MaterialWork - pic08

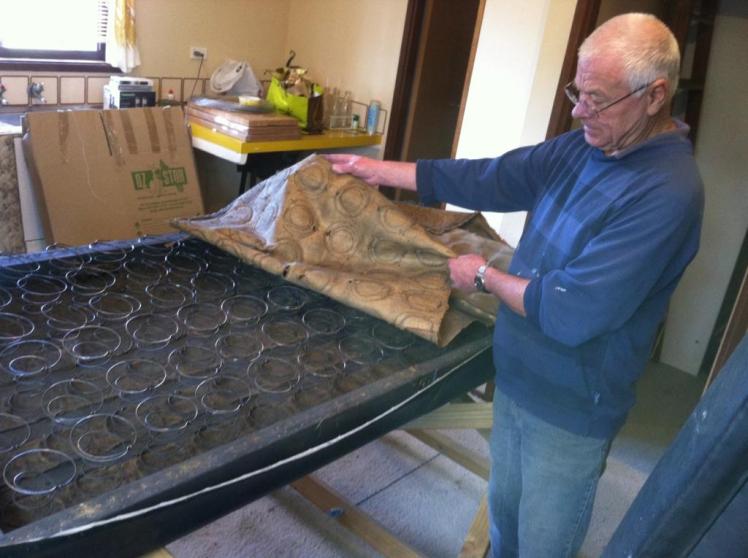
The idea is to remove the upholstery without unduly damaging the wooden frame underneath. Each of those springs inside was hand stitched in three places to the hessian covering. Most were still intact, so each of those stitches needed to be individually cut and all the edge tacks removed. This is what’s inside….90 springs, yeah, count ‘em, 90 springs, and 90 years worth of soot and filth.

MaterialWork - pic09

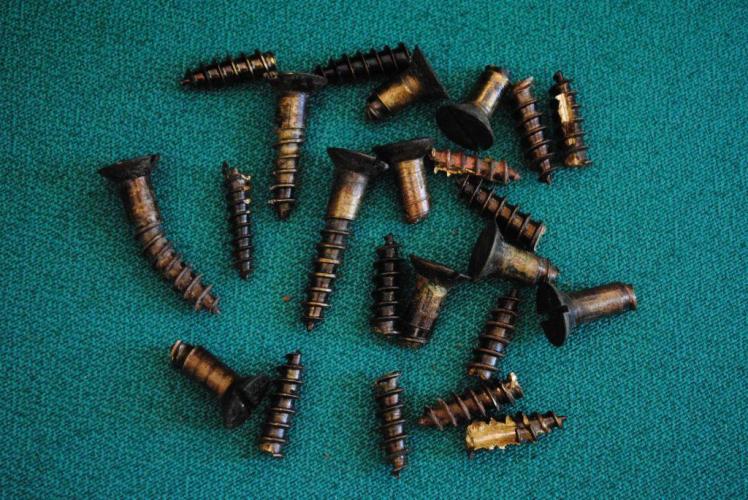
Next job is to remove the brass hinge pivots which are held on by short brass screws. Many of these screws were broken off inside the wooden frame so an ezy-out was used to extract the screws then each hole plugged and re-drilled where necessary.

MaterialWork - pic10

New screws fittings refitted.

MaterialWork - pic11

Another important job is to remove the sharp corner from the inner edge of the wooden frame. This sharp corner is the cause of much of the damage to the hessian and outer cover visible in some of the previous pictures.

MaterialWork - pic12

Alan mans the vacuum to clean what he can.

MaterialWork - pic13

…and any loose springs secured, the original hessian is replaced with canvas. This canvas came from a grubby roll lying around the Eveleigh shed but the washing machine has them looking great although perhaps Michele’s washing machine will never be the same again.

MaterialWork - pic14

The canvas is temporarily tacked then each spring is hand stitched to the canvas like this… That’s three stitches in 90 springs in each bunk times ten bunks equals 900 springs and 2700 stitches… no wonder I’m going nuts.

MaterialWork - pic15
MaterialWork - pic16

When I have all the springs secured, George tensions and tacks home the canvas… The next step is to stitch the old underfelt back on. After this, the bunk moves to George’s bench and I start on the next one.

MaterialWork - pic17

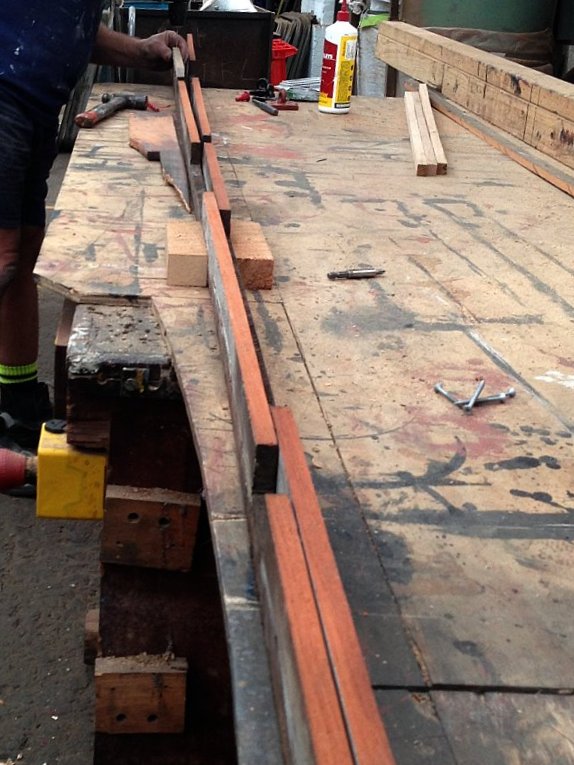
First George applies the edge trim around the bunk – this is a bit harder than it looks. The ends of the bunk are flat but with a step near one end and the long sides have a curved surface, so getting the corners right took some doing. Cutting around the hinge sections was a bit fiddly too.

MaterialWork - pic18

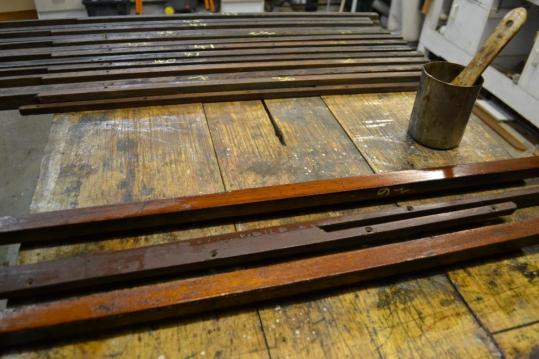
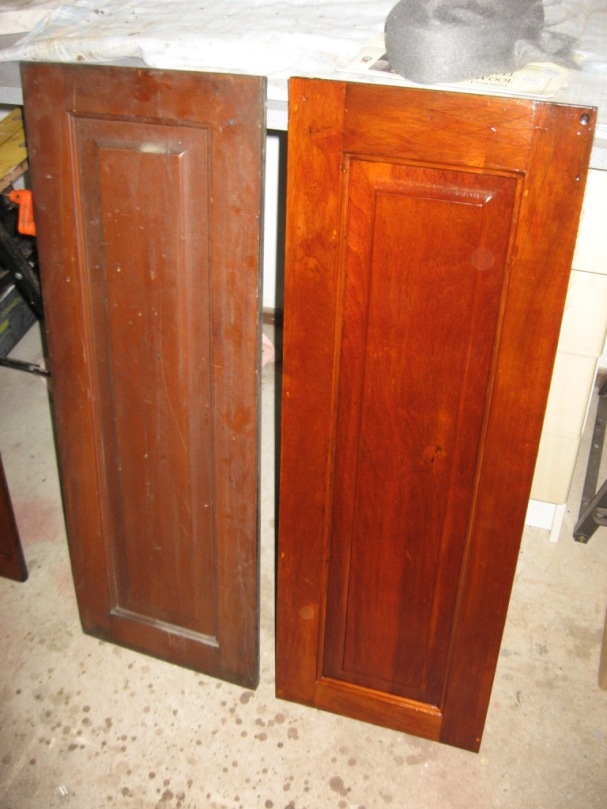
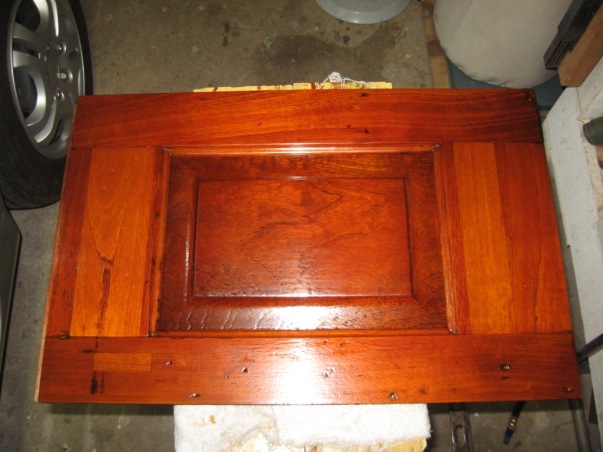
This is the underside of the bunk and it will be covered with one of those beautifully restored French polished red cedar panels.

MaterialWork - pic19

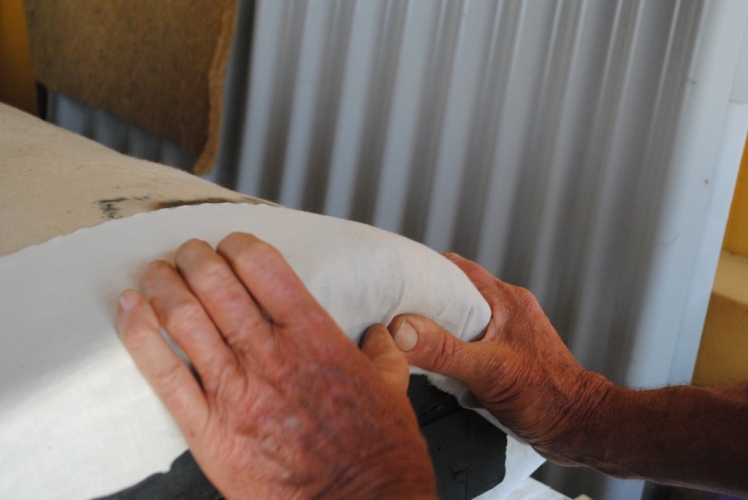
Then, on the other side we are almost ready to cover. Here the old underfelt was damaged along the edges, so some packing was required to get a smooth finish.

MaterialWork - pic20

When that’s done the cover goes on.

MaterialWork - pic21

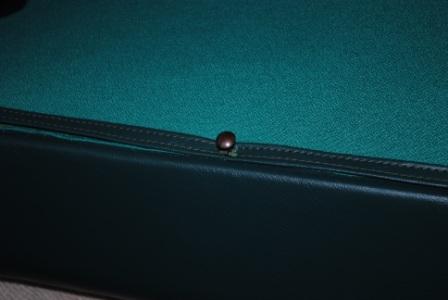
…then the edge trim and fittings. Note the measuring stick, just to make sure that the studs are perfectly placed.

MaterialWork - pic22

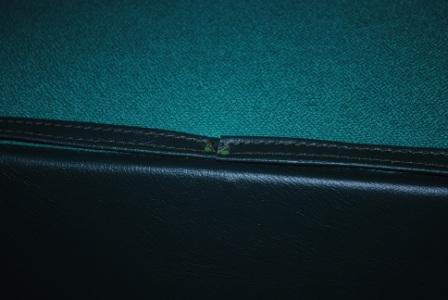
It’s the attention to detail that makes this such an amazing job. The quality of the workmanship is truely astoundoing. This is how to disguise a joint in the trim:

MaterialWork - pic23
MaterialWork - pic24
MaterialWork - pic25

Tada! What joint?

MaterialWork - pic26

And this one is finished. Who could believe that an old run down railway carriage bunk could look this good after so many years of service?

MaterialWork - pic27

The finish on these bunks would give Ritchie Bros a run for their money!

MaterialWork - pic28

There are heaps of hidden secrets in these TAM sleepers. There are three holes at each end of each bunk to let the air escape when someone sits on the bunk. Inside each of the holes is a tiny brass gauze filter, presumably to keep the vermin out while allowing air to flow freely.

MaterialWork - pic29

The Seat Backs:

The seat backs are a two sided affair with these units folding forward to make the lower bunk. While these bunks were in similar poor condition to the upper bunks, on the other side the damage was confined to the vinyl covering in the bottom corners so the inner springing was left undisturbed.

These have a headrest section at the top and as well as being secured around the perimeter, the covering is secured to the frame along the beading at the bottom of the headrest.

MaterialWork - pic30

Work gets started on stripping:

MaterialWork - pic31
MaterialWork - pic32

And when the covering is removed, you find the ugly truth…

MaterialWork - pic33

This one had been repaired with a patch of vinyl placed under the outer covering and stitched through to the calico and horse hair underneath.

MaterialWork - pic34

So with some new fabric and a bit of coconut fibre to make up for a shortage of horse hair, a repair is made.

MaterialWork - pic35

So now it’s starting to look better…

MaterialWork - pic36

And some expert hand stitching has them looking like new…

MaterialWork - pic37
MaterialWork - pic38
MaterialWork - pic39

Some packing is placed over the stitching and then the cover goes on; it’s just that fiddly bit around the hinge that brings forth the occasional curse, other wise it’s all plain sailing for George.

MaterialWork - pic40

The Seat Bases:

If you thought that lot was hard going, this next bit is even more of a hurdle. This is what they look like from below, all looks pretty straightforward, eh?

MaterialWork - pic41

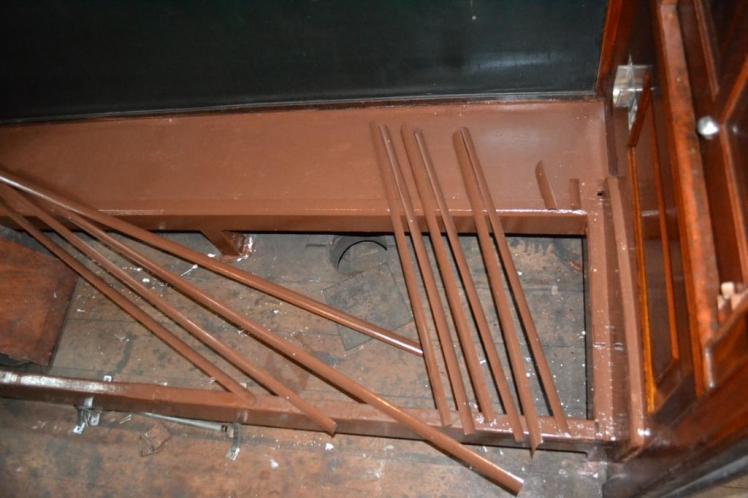
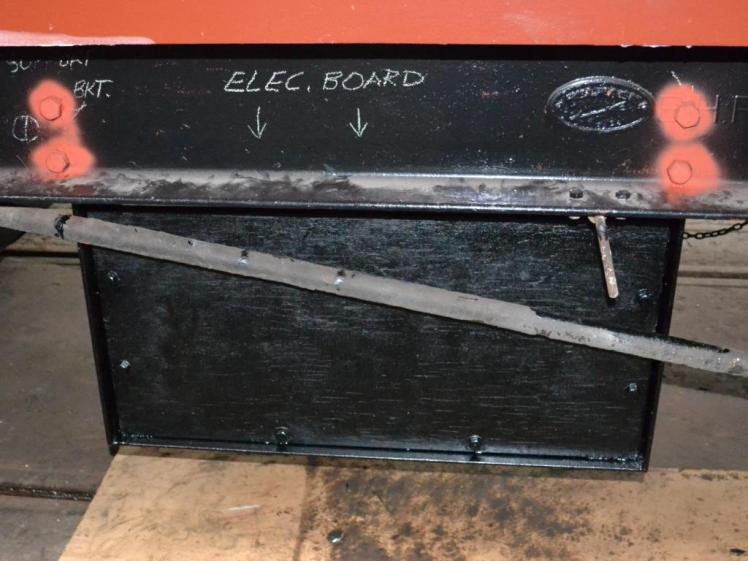
But these units have had a pretty hard life. Another one looked like it had been dropped from a great height or run over by a truck and this metal support had been busted off and bent. The timber frame was also broken. We were able to remove the metal part from the wooden frame to straighten it out.

MaterialWork - pic42

Then repair the timber frame and re-install the metal piece and bolt through the timber to give greater strength.

MaterialWork - pic43

As well as the impact damage to the underframe, this seat was also in the worst condition inside. Not all of the seats were dismantled to this extent but this series of photos shows just what goes on when you sit on a 1939 TAM sleeping car.

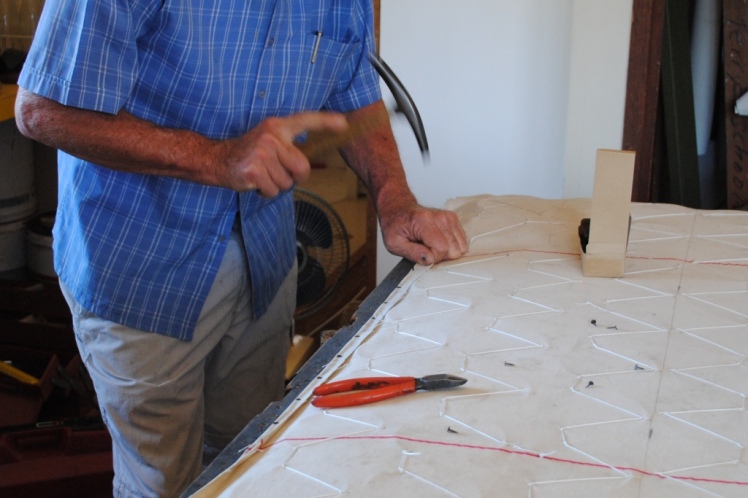
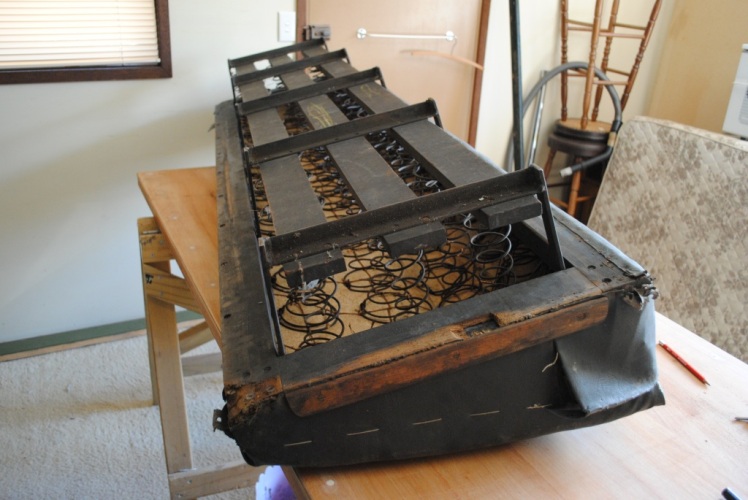
After removing the outer vinyl covering, George decided to take off the next layers to expose the springing underneath. All of these springs are laced together with twine in different places to hold them in position and you can see clearly on the nearest row how this lacing has broken allowing the springs to escape their position. This was the case at numerous places throughout the spring set.

MaterialWork - pic44

The springs across the front and ends are short and screwed to the timber frame at the bottom.

MaterialWork - pic45

The three rows of springs inside that are all longer and extend down to the frame lower down. Some of these were full length springs and others were shorter springs placed one on top of the other, then laced together with twine. Perhaps they didn’t have enough of the correct length springs, or perhaps it was a later repair.

MaterialWork - pic46

Amazing the trouble they went to in the old days in building these seats.

MaterialWork - pic47

This is George carrying out the tedious task of relacing the springs.

MaterialWork - pic48

The cane edge piece along the front of the seat was not as straight as George would like so that presented a bit of a challenge. By relacing the springs, we were able to straighten this out somewhat.

MaterialWork - pic49

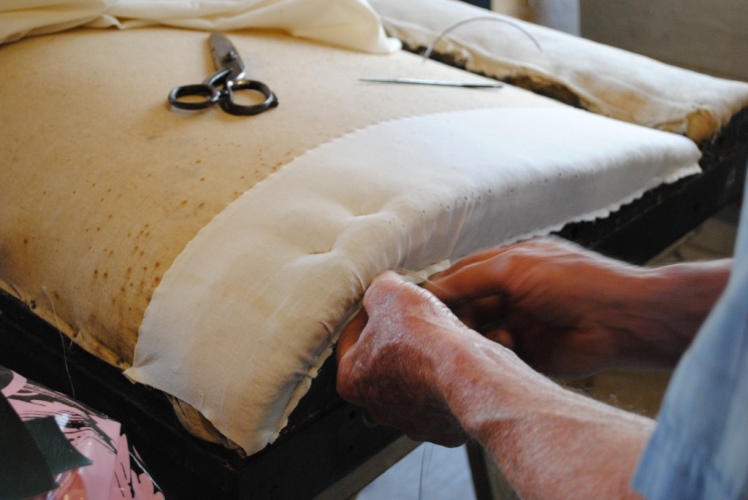
Reattaching the seat padding takes a good eye, a long needle and a lot of patience.

MaterialWork - pic50

Other seats were in much better condition. This one only required some minor repair to the corners. Note that this one has the cane edge curved around the corner rather than two separate pieces joined at right angles.

MaterialWork - pic51

A bit of hand stitching around the ends is the most tedious bit of installing the final cover.

MaterialWork - pic52

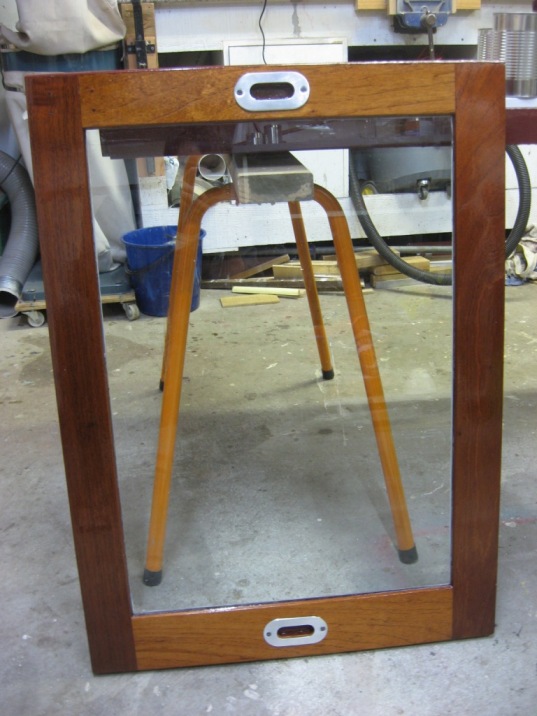
Producing a stunningly finished refurbished TAM seat.

MaterialWork - pic53

The Dicky Seats:

Each of the five compartments has a small fold-down dicky seat, presumably so you can sit in comfort to tie your shoelaces. These were in fairly good condition but we recovered them so that they matched the vinyl used on the other seats.

MaterialWork - pic54

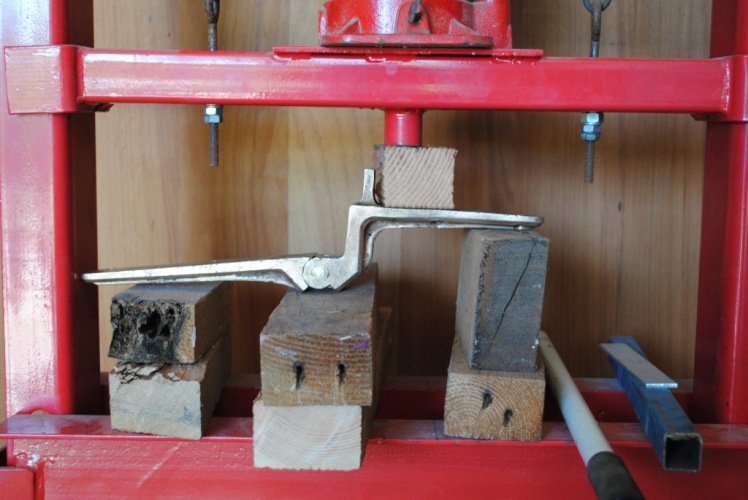
They consist of a small timber base, vinyl covering with hessian over horse hair underneath. The reupholstering of these was quite straightforward but the hinges presented a bit of a challenge. We only found nine of the original ten hinges but another four were recovered from two stray seats found in the shed. Out of the thirteen hinges, only four are stamped clearly as making up two pairs.

MaterialWork - pic55

Most of the hinges had the short leg which attaches to the carriage wall bent to some degree and so we straightened these in a hydraulic press.

MaterialWork - pic56

And here are a couple of the completed seats.

MaterialWork - pic57

The only remaining hurdle now is to secure the hinges to the seats and the wall.

The Job Finished:

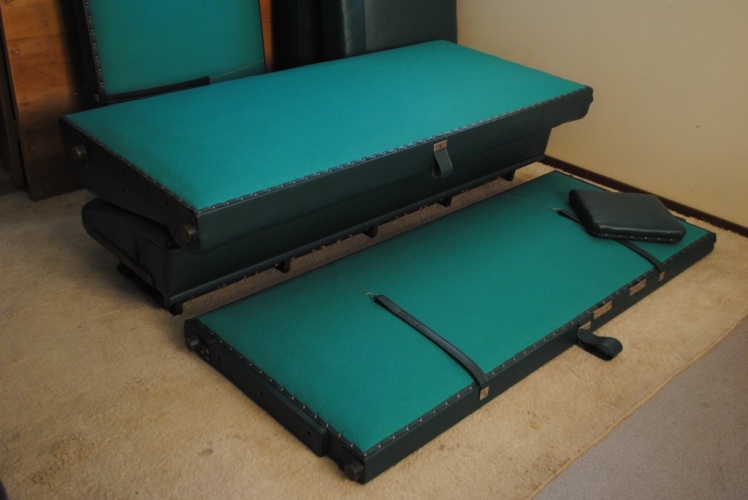
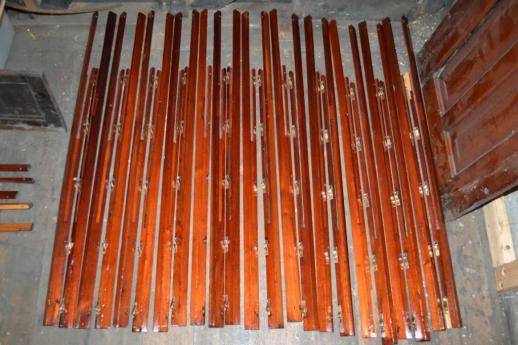
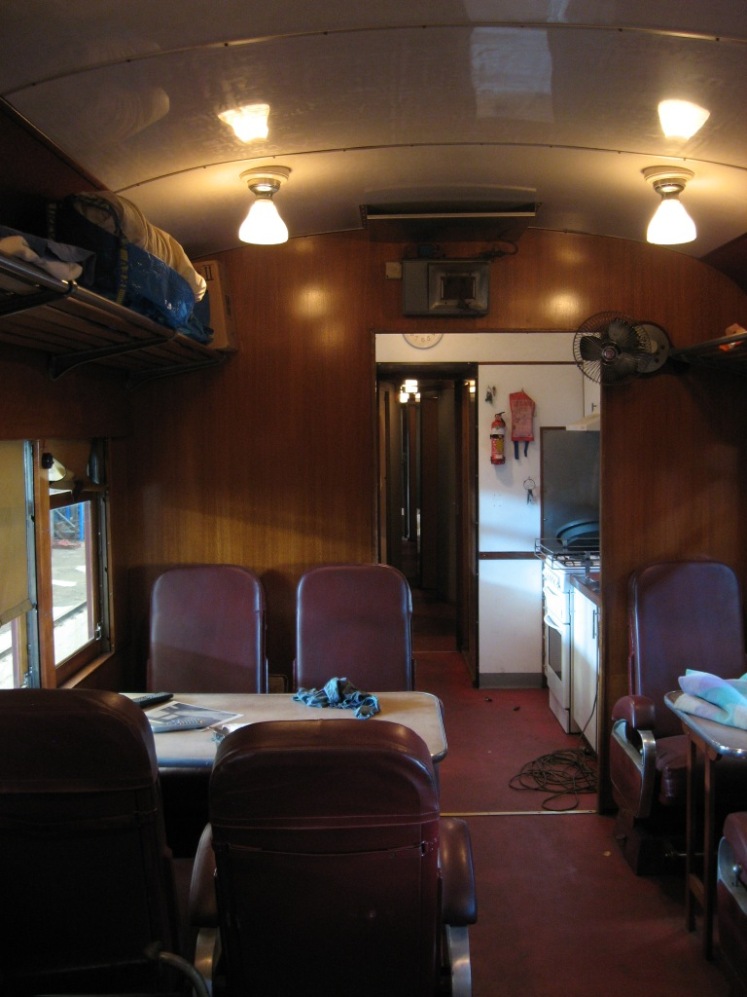
Now all of the seats have been reupholstered this is how they look. At the front is an upper berth and on that is one of the dicky seats which will be attached low down on the carriage wall. Behind is the seat base and back in their approximate relative position.

MaterialWork - pic58

And how the lower berth looks when folded forward.

MaterialWork - pic59

Here’s a few of the tools used to make it all happen.

MaterialWork - pic60

We didn’t keep an account of all of our working hours; a fair guess would be about 15 to 20 hours on each of the 15 large units but we don’t consider it a chore. It’s not quite finished yet though, George is now working on making up the safety straps for the upper berths. He’s borrowed a sample from another TAM and Todd has found a few of the original fittings so we will have something close to the way it was.

We would like to thank the 3801 Limited crew for allowing us to participate in an interesting and satisfying project and for giving us the support that they did.

MaterialWork - pic61

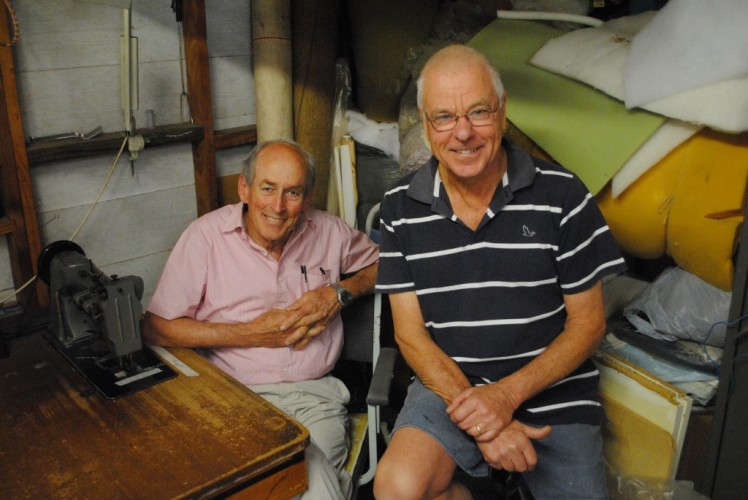
Satisfied: Upholsterers George and Alan pose for a photo after their tireless efforts.

Shutter Runners

Work is underway getting the shutter runners into a presentable form. Years ago, these TAM’s had polished timber shutters, runners and sills but somewhere along the way, the railways started painting them brown. Altogether, we require over 90 shutter runners for this car.

We start by taking a pair of runners from the pile, which resembles a casualty ward.

Runners01

One face retains the shellac, which is stripped using methylated spirits to avoid clogging the sand paper.

Runners02

Each metal catch is removed, stripped to bare brass and polished. Both timber faces are sanded back to reveal the beautiful Australian cedar wood grain, then the catches are re-fitted. Each catch is uniquely fitted, and care must be taken to ensure each returns to its original spot!

Runners03

Over the years, some of the original runners have been damaged, so numerous repairs are required along the way.

Runners04

The runners are then painted with 4 coats of clear finish for longevity.

Runners05

Many of the original runners were either beyond repair or have been lost over the years, so the tedious process of manufacturing new runners is also being tackled. Each catch is stripped and polished, and then its footprint is marked in the timber using a sharp razor blade.

A chisel burrows out its housing.

Care and perseverance produces a nice neat fit for each catch.

Back at Eveleigh, each compartment is having its timber trim removed to strip shellac.

Runners09

With the trim removed, the compartment looks like this.

Runners10

Trim re-fitted.

Runners11

French polished and buffed and jewellery re-fitted. Working fans are a god send for the volunteers working on this carriage during the hot summer months.

Runners12

A repair has been made to a damaged compartment door frame.

Runners13

All the floor quads have been salvaged and painted ahead of laying the new flooring.

Runners16

Steve has used off-cuts from the lounge pressed metal ceiling to replace the missing sheet in the Redfern end of the car.

Runners14

The roof near the centre car doors is also progressing nicely. A sneaky vent will cover the former hot water service flue.

Runners15

It’s all go in TAM heaven! More updates soon.

Spring Update

We’ve spent several days fitting all the windows to the car, making a striking difference to its appearance.

L516SpringUpdate_pic01

Steve’s doors are also re-fitted and the final timber trim is machined and attached in situ to ensure a good seal ahead of final painting.

L516SpringUpdate_pic02

At the ends of the car, the new safety glass is fitted.

L516SpringUpdate_pic03

Work has recommenced to fit-out the former toilet at the Redfern end of the car. A full retention tank toilet system is being installed in the former attendants’ compartment near the centre of the car (well clear of the bogies to simplify the plumbing arrangements). Hence this end “toilet” will likely remain only as a stand-by toilet and a handy store room. The tricky task of machining a one- piece plywood polygon roof is complete.

L516SpringUpdate_pic04

A neat and functional trap door is installed for access to the roof cavity.

One of our diligent workers has started panelling the Redfern end of the corridor. We’ve all scratched our heads about what we can put here, but he’s never let us down before so we’ll wait and see what eventuates in this space!

L516SpringUpdate_pic06

Buffing the French polish is underway in compartment 17/18 while the bunks and seats are enjoying a holiday with our volunteer upholsterers. When the repairs are complete, the beds and seats will be re-fitted to these refurbished compartments.

L516SpringUpdate_pic07

The fan switch blocks and other jewellery also look great refitted.

L516SpringUpdate_pic08

Then Evan gets busy stripping the next compartment ahead of refurbishment. Somewhere in its departmental life, plastic laminates appeared on certain shelves in these compartments, which Evan is removing to restore the polished cedar timber.

L516SpringUpdate_pic09

Some panels were removed from the car for refurbishing, with some spectacular results.

L516SpringUpdate_pic10

Other panels require a lot more work than just a rub back and polish.

L516SpringUpdate_pic13

Chris and Co have stripped and scrubbed clean all the half-size shutters. With nearly 100 shutters in these timber cars, this is no small task but their endurance is paying off.

L516SpringUpdate_pic14

The Rowling workshop at Engadine has been busy plugging the old holes as well as any other timber repairs as required, including numerous broken louvers.

L516SpringUpdate_pic15

Some of the original cedar bunk timber panels were sourced from storage, and the bland departmental green paint stripped back to reveal the beautiful Australian timber grains synonymous with these cars. Timber repairs will be performed and these panels will be French polished and installed on the lower face of the refurbished bunks. It doesn’t look much at this point but.

L516SpringUpdate_pic16

…the results of a few days toil are nothing short of spectacular.

L516SpringUpdate_pic17

Cameron has been busy constructing the structural timber work at the lounge end of the car.

L516SpringUpdate_pic18

Thomas is working his way around filling all the window sill screw holes with putty ahead of final touch-ups.

https://eveleighprojects.files.wordpress.com/2014/11/l516springupdate_pic20-e1414966085385.jpg

Brett’s pressed metal ceiling painting works continue with the section near the centre doors.

L516SpringUpdate_pic21

And we finish yet another Saturday/Sunday double working bee with the familiar smell of smoke and hot oil, as the Lachlan Valley Railway’s 3237 returns from running a “Sydney Steam” train trip with 3801 Limited. Eveleigh is a multi user facility, and the LVR are just one of the many groups that currently call Eveleigh home.

L516SpringUpdate_pic22

Time To Shine

We’ve spent the last month or so painting the external body work of the car into gloss enamel, but we’ll come back and paint the frame once the diaphragms and buffing plates are installed. In the mean time, we’ll focus on the many smaller jobs that need to happen.

L516 - ShineTime - pic01

The door jams are stripped of components and undercoated, and will soon be painted into gloss.

Each door has also been stripped, repairs made where necessary, the whole assemblies painted, and new safety glass will be installed.

Each fan in the compartments is controlled by a switch mounted on a cedar block. The blocks are showing their age, so some refurbishing was called for. They first had the label removed and shellac stripped.

Then several layers of shellac were applied and French polished, and the “FAN” label is re-attached.

The sills have had several coats of brown paint and are now awaiting installation.

Each of the nickel plated window runners has been lovingly cleaned with steel wool and polished.

Then paired and set aside ready for installation.

L516 - ShineTime - pic12

We’ve also started on the shutter runners, which all need to be sorted, repaired, sanded and painted before we can even think about installing them.

L516 - ShineTime - pic13

With all these different jobs bubbling along, it won’t be too much longer before this old TAM is out and about for the enjoyment of the people of NSW…although some volunteers appear a little more eager than others! It’s great to see younger generations showing an interest in restoration works.

L516 - ShineTime - pic14

More updates soon.

Fan Fits

The volunteers have been working in pairs to install the fans that were restored previously (refer TAM Fans post). The tricky part here is that the bolts extend through into the next compartment and hold that fan in place also.

L516 - Fan Fits - pic01

The sills in the corridor end of the car were inspected and it was decided to carefully remove them to perform some small timber repairs while preserving the majority of the original Australian red cedar. Chris gave the sills a quick rub back with the sander located the nails holding it down.

L516 - Fan Fits - pic02

The crook edges of the sills were cut off and new timber spliced in place

https://eveleighprojects.files.wordpress.com/2014/07/l516-fan-fits-pic03.jpg

NSWGR TAM sleeping cars were built by 3 different manufacturers – Eveleigh Carriage Works, Meadowbank and Ritchie Brothers – resulting in slight variants between the different cars. However, one thing that was standard to TAM cars was the use of a “one-third” size battery box mounted on one side of the car underframe, and a “two-third” size battery box mounted on the other side. The reason this was done seems to be lost to history, but L516 will be fitted with a single standard size battery box to standardise our carriage fleet.

The volunteers have completely rebuilt the battery box for this car and the weekday metal work guys have been busy fitting it to the car.

L516 - Fan Fits - pic05

The original 24V DC carriage electrical system fitted under the frame comprises a battery box, a DC generator and a generator regulator board, all of which was stripped from the car and replaced by 240V AC when L516 was a works car in her last years of service with the railways. So its been a massive job to reinstate the original 24V electrical system. A new generator regulator board has been manufactured and fitted by our weekday work team.

L516 - Fan Fits - pic06

The electricians soon follow, slipping the timber board off to install the regulator components. From left to right are the regulator box, diode, and on the right is the current sensor circuit.

L516 - Fan Fits - pic07

Under the car frame, any remnants of the old 24V DC cloth coated cable were documented before we removed it in readiness for the new cable runs.

L516 - Fan Fits - pic04

At great expense to 3801 Limited, we are leading the heritage movement towards modernising carriage toilets by progressively installing retention toilet tanks on all the cars in our care. With the arrival of the plastic container for L516, the weekday metal work volunteers will start manufacturing a steel frame prior to installing the tank to the car.

L516 - Fan Fits - pic08

At the end of this Saturday/Sunday double working bee, and in the glorious afternoon sun, we welcome Lachlan Valley Railway’s 5917 back into the security our shed as many engines have done over the years. Goodwin Alco’s 4501 looks on.

L516 - Fan Fits - pic09

The 59 had hauled a private charter train to the Hunter wineries.

ATP Heritage Community Days (May 2014)

On Friday 16th and Saturday 17th, 3801 Limited participated in the Australian Technology Park Heritage Community Days weekend.

We opened the doors of our Large Erecting Railway Workshop for the enjoyment of the general public, providing the chance to explore the restoration works as well as inspect the collection of locomotive, and carriage rollingstock that was on display.

LES_OpenDay2014 - Pic01

The volunteers talked to the visitors, answering questions about the history of railways in NSW, as well as explaining the valuable role of heritage trains in today’s modern society. The open display within the Large Erecting Shop was a part of a grand tour of the whole ATP complex. This coordinated by the Australian Technology Park.

LES_OpenDay2014 - Pic02

Aside from the heritage exhibits in both the Large Erecting Workshop, Blacksmiths Workshop, Pumping House and around the ATP facility, an assortment of Jane Bennett’s artwork was on display also.

There really was something for everyone at the ATP Heritage Community Days event – keep an eye out for the next one!

LES_OpenDay2014 - Pic03

More photos from the weekends event can be found on the ATP Flickr page.

A look back (2012) – New batteries for ABN2194

The old lead acid batteries on crew car ABN2194 had failed, and a set of replacement cells were sourced for this car. With the battery box cleared out, timber crates were manufactured, new cells were fitted, and the water was topped up too.

ABN_BatteryReplacement01

Before the lights were tested in the workshop.

ABN_BatteryReplacement02

Then they were tested out on the mainline on a return trip to Goulburn.

Battery voltage and charging current were measured during the trip to evaluate its performance.

A look back (2012) – L516 wiring and fitting electrical work

The great thing about working at Eveleigh is the broad range of skill sets and age groups that you come across.

Electrical engineering student Brad Benson joined the project to help complete the wiring and electrical fit-out of the car, and was quick to master some new skills. The fan and berth circuits were drawn through behind pressed metal mouldings and timber panelling.

Pretty soon, we were starting to put the whole show back together for the first time in several years, and the TAM is another step closer to being completed. Timber discs for the lights were sanded and undercoated ready for re-fitting roof lights in the compartments.

L516_DecemberWiring_03

A common misconception is that these car rooves are “white”. In fact the original colour is “Manilla”, Australian Standard Y45, which is a slightly yellow tinted colour. With Brad’s help, the high gloss has returned to the inner rooves of L516 (really TAM502) for the first time in many decades.

L516_DecemberWiring_04

Meanwhile, dining car AB91 provides some good ideas for how to light the gutted end of L516.

L516 (Existing):    

AB91:                      

Chris is keen to see what might look good, but I think we better sleep on this one.

A look back (2012) – Rewiring L516

L516 is a project that has been at the heart of our volunteer working bees at Eveleigh for several years, but has been put on the back-burner with other projects taking the limelight. But with the SFN overhaul safely behind us, L516 is again progressing to the day when she will be carrying paying passengers.

Regular bloggers from old will recall that L516 began as TAM502 built by Ritchie Bros. Towards the end of its working life it was part of a breakdown train with 240V fluorescent lights and a generator fitted for the work. This unfortunately meant the original 24V DC lighting circuits were almost completely stripped, while any remains were cut off so short that is was almost impossible to re-draw circuits through behind the panelling. Many circuits remained unidentified and cut in several places making tracing the existing circuits almost impossible.

L516_JulyWiring_01

The most simple and straight forward circuit to begin with was the number boards, which was knocked over in a day.

By the end of the week, with 3 out of the 4 circuits near completed, making the car not only look and feel like an old TAM, but also shedding some light on the remaining inner-car jobs that remain for the carpenters and fitters.