Overhauling a Carriage Part 2: Bogie Work

The following is a selection of photos were taken from our mechanical team showing some of the key steps in
a complete overhaul of one of the bogies on SFN2182.

With the carriage body hydraulically lifted and layed onto temporary stilts, the Bogie is removed from the carriage and the stripping out of brake beams and components
commence.

SFN2182_Bogie01

The Yoke and Draft Gear are inspected for wear and cracks.

SFN2182_Bogie02

Springs and components are removed for inspection and requalification/reclamation.

SFN2182_Bogie03

Swing plank removed in preparedness for overhaul, inspection and bush renewal.

SFN2182_Bogie04

Swing plate and leaf springs are re-fitted.

SFN2182_Bogie05

The Bogie Bolster which holds majority of the carriage weight is replaced after crack testing.

SFN2182_Bogie06

With the Bogie replaced and the brakes connected up the carriage is now ready for air brake testing before being allowed to return to service.

SFN2182_Bogie08

And with this work on the second bogie (the other one was completed earlier) this completes the overhaul of SFN2182.

Overhauling a Carriage Part 1: First comes the elbow grease

The overhaul of the car body on SFN2182 was completed late in 2011 and the following is a selection of photos showing the completion of the job.

Following the treatment of any corrosion, the sides of the car were sanded back.

SFN2182_overhaul_2011_Blog_01

The toilet windows were removed to ensure all areas were properly prepared prior to any painting. There was no escaping the candy colours, which were from the State Rail Authority days of the 1980s.

SFN2182_overhaul_2011_Blog_02

Speaking of which, the recent arrival of 42101 also retains signs of the Candy era, and would likely have hauled cars like SFN2182 on the main south in its heyday. The 421 is privately owned and restoration work is being finalised pending reactivation for use on primarily heritage work.

SFN2182_overhaul_2011_Blog_03

2 coats of metal primer was followed by the first coat of Indian red.

SFN2182_overhaul_2011_Blog_04

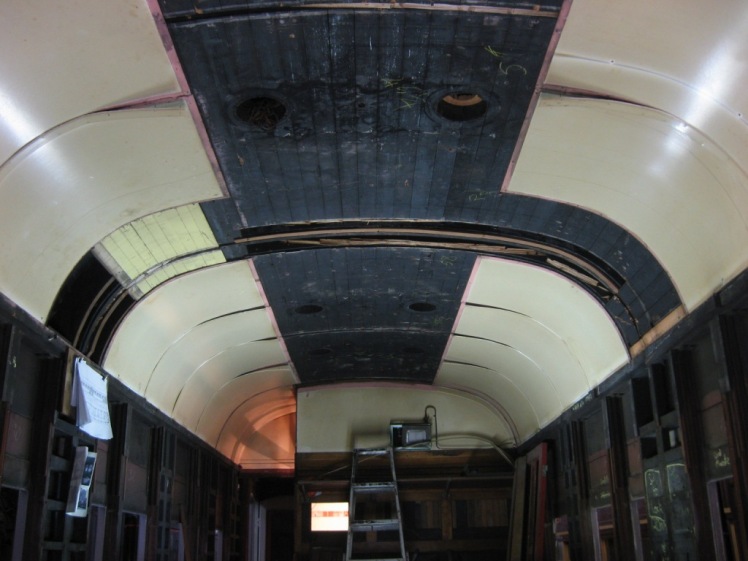
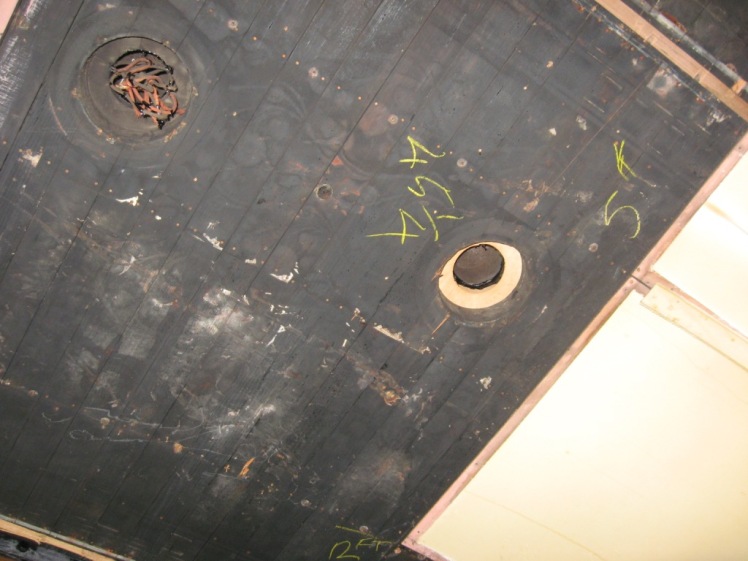
Car internals were dismantled to get in and treat some troublesome corrosion. But before too long, it’s looking pretty good.

SFN2182_overhaul_2011_Blog_05

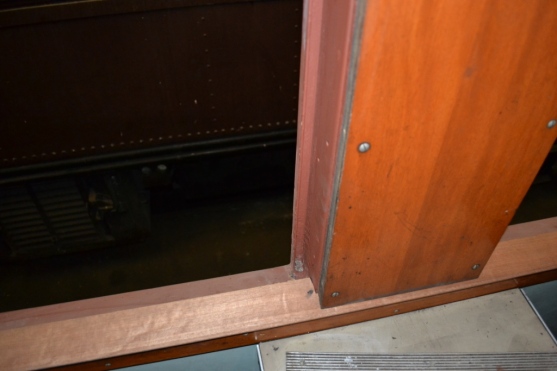
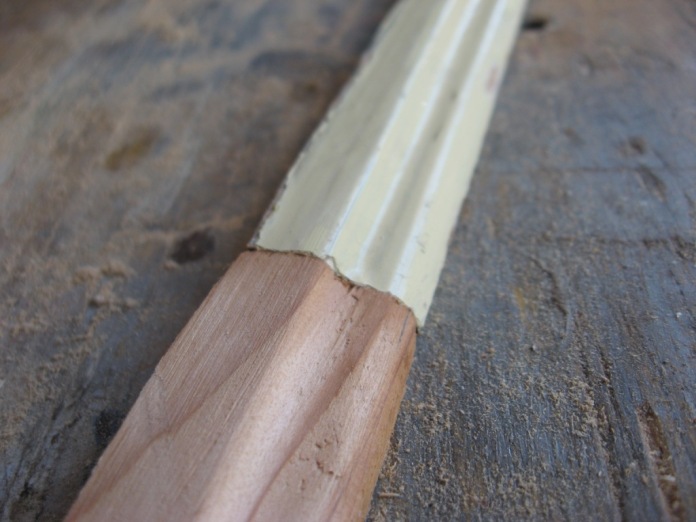
…and the new sills have been machined and test fitted.

SFN2182_overhaul_2011_Blog_06

The Rowling workshop at Engadine had the new sills varnished and polished.

SFN2182_overhaul_2011_Blog_07

The top-coats were completed a few weeks later, and our resident car builder Dave Mathews went about re-fitting the windows and sills. Cheers Davo!

SFN2182_overhaul_2011_Blog_08

There is nothing like a deadline to focus ones attention, and with the Sydney Special Children’s Christmas Charity trip bearing down on us, the final touches were applied in readiness for this important annual event.

SFN2182_overhaul_2011_Blog_09

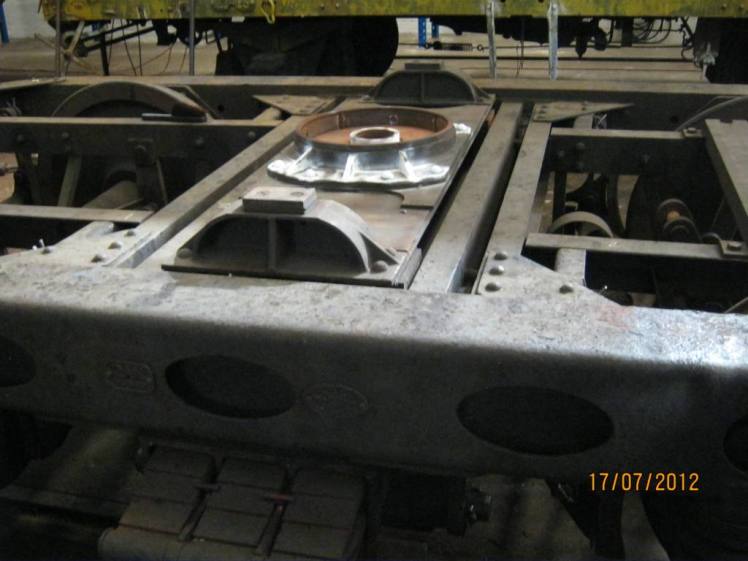
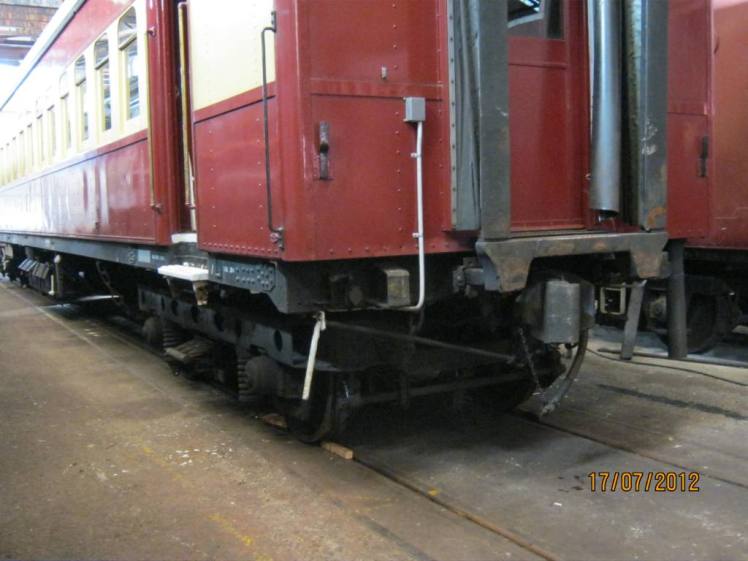
Away from the carriage body, the car was also lifted and the bogie overhauled.

SFN2182_overhaul_2011_Blog_BOGIE

I think we can safely say that the results speak for themselves, a grand effort by a dedicated team of volunteers.

SFN2182_overhaul_2011_Blog_10

That was easy! What was all the fuss about??

SFN2182_overhaul_2011_Blog_11

With a steam loco on the front, SFN2182 is again part of the active 3801 limited fleet. Here ARHS ACT’s 3016 sits proudly at Central Railway Station with the Special Children’s Christmas Charity train in December 2012 before departure to the Rosehill Gardens. The SFN is the second carriage behind the steam engine.

IMG_7701

The greatest satisfaction (for us volunteers) is seeing something you worked so hard on travelling all over the state being enjoyed by the people, both passengers and line-side photographers.

SFN2182_overhaul_2011_Blog_13

Before long, SFN2182 is back in familiar territory, overlooking the big blue Pacific Ocean on the Cockatoo Run.

Wiring the Gutted End

With excellent progress being made in the compartments of L516, a move was made to installing a functional lighting arrangement (with heritage value) in the gutted end of the car.

Gutted516_01

A survey of the roof beneath the masonite sheeting showed reminants of the old compartments. The luggage racks were located on the left (see faded Manilla painted tongue-and-groove panelling), and the compartments were on the right in this space. Clearly visible is the location of the partition between the 3rd and 4th compartments, shown in the center of the photo.

Gutted516_02

The original cloth insulated wiring was evident, and the holes through which they run will be re-used. Note the chalk markings, presumably measurements in inches.

Gutted516_03

We chose for a fourth option to those considered previously, which will give the best throw of light. This option utilises existing cable runs, and is probably the closest to the original style.

The wires were run by carefully removing some of the timber planks before the circuits were soldered and globes installed.

With the masonite roof back up, it’s the end to another very satisfying volunteer working bee

Gutted516_10

Now we have to find where we left the lamp fittings.

It’s all in the detail!

Big jobs like this need to be broken down into smaller bite-sized pieces, and so we’ve been trying to work our way through the compartments one at a time where possible.

L516_Jan13_pic01

But its the small jobs that seem to occupy the time, and new timber mouldings needed to be manufactured to replace the old ones that were removed during re-wiring work.

At the Rowling workshop at Engadine, the wood machinery was set up to machine replacements, and the results are a good match.

L516_Jan13_pic02

Several lengths were machined.

L516_Jan13_pic03

Back at the shed, they receive a coat of undercoat.

L516_Jan13_pic04

We also undercoated the air vents at the same time. These were removed to access the cable chases through the roof line, and will be topped off with Manilla prior to re-fitting.

L516_Jan13_pic05

The roof was sanded prior before applying any undercoat.

L516_Jan13_pic06

In some places, this revealed the original red cedar under the paint work.

L516_Jan13_pic07

For a while there, the roof was looking like patch work, with light fittings dangling from the roof…

L516_Jan13_pic08
L516_Jan13_pic09

But patience pays off, and one by one, the lights are re fitted.

L516_Jan13_pic10

And then the shades were added.

L516_Jan13_pic11

One of the original berth light fittings were refurbished, and fitted in place to remind us of where we are heading…and what we’ve to look forward to.

L516_Jan13_pic12

From the outside, its also looking good.

L516_Jan13_pic13

But there is always more to be done.

SFN2182 Overhaul

During 2011 passenger car SFN2182 has been withdrawn from service and is being overhauled at Eveleigh.

Picture 079

Work has commenced repairing the roof area.

Picture 080

The malthoid covering on the roof was in need of repairs and the end timbers required replacement.

Picture 081

Whilst most of the roof will only require painting some sections had to be removed to repair rotten timbers in the roof.

Picture 082

It soon became obvious that this was not going to be a quick repair job. (Is it ever?)

Picture 084

What started off as a simple job soon became a much bigger than expected task.

Picture 085

The end sections of malthoid were removed to repair the wood work. All metal sections were treated to prevent rust.

Picture 086

A new wooden section will be manufactured and spliced into place before the malthoid material is reapplied.

Picture 089

New wooden mouldings were cut and shaped to the correct roof profile. These sections were primed and reapplied before the malthoid was replaced.

Picture 088

At the same time the removal of body rust began. This project will continue throughout the year and the car will receive a mechanical overhaul during this period. More updates throughout the year.

L516 Update

Whilst we have not been working on L516 in recent times we did take the opportunity to use up some left over paint from the HKB project.

Picture 022

The car has been in painted primer previously.

Picture 036

We decided to use up the remaining paint from the HKB project and painted one half of the car. Steve begins by painting around the timber strips.

Picture 037

Soon the colour begins to cover one end of the carriage.

Picture 038

The buffers were recently removed and replaced as the originals were bent.

Picture 041

Slowly the appearance of the carriage begins to change.

Picture 042

Picture 043

And now to paint around and above the windows.

Picture 045

Picture 047

Picture 051

And continuing along the side until the paint ran out.

Picture 048

We hope to return to working on this carriage during 2011.

Marker Lights

It is time to replace the marker lights on both ends of the HKB.

Picture 005

Each marker lamp was previously overhauled and was ready to be remounted onto the ends of the van.

Picture 006

The backing plates were unfortunately not in a good enough condition to reuse so new backing blocks and plates had to be manufactured.

Picture 013

Each backing block and plate was primed and mounted to the body.

Picture 015

Electric wired were pulled through the block ready to wire into the marker lamps.

Picture 010

Marker lamps were mounted and painted in the final colour.

Picture 054

An end view of the HKB with marker lamps reattached.

Picture 053